Pages

Tuesday, July 23, 2013

Dog Collar Tutorial

Hello!

I'm very excited to share this with you! The tutorial I'm reviewing today can be found here by Country Brook Design. The instructions were very easy to follow and it only took about 20 minutes start to finish!! I think I'm going to have to  make more...to my dog owning relatives, don't be surprised if you get one of these for Christmas :) And, did I mention they are so much cheaper (not to mention cuter) than the ones found in the store?


I made a Steeler's collar sized extra small, and a medium Iowa State collar. 
Cute huh?

Felicity and Greg didn't like it. I suppose cat collars will not be in my future.


This is definitely one to try for yourself!
Thank you, and see you next time!


Saturday, June 30, 2012

Steelers Handbag - Custom Order!


I made this purse on the request of one of my coworkers who is a HUGE Steelers fan. I have some experience with making bags, but I've never done anything this extensive before - mostly totebags.
The parameters I was given for this project were to "make it like the bag I have now, but Steelers." :) Since I'm not one to (willingly) follow someone else's pattern, I made a diagram on scrap paper and set to work.
What do you think? I personally could care less for football, but apparently there are millions of fans nationwide or something like that...
After she brought it to work, I immediately had two requests for identical bags! I think that qualifies as a job well done?

Tuesday, April 17, 2012

Bathroom Scale Makeover - Tutorial

You got a new scale!
Nope.
Oh...Then what'd you do with that crap one?
That is that crap one :) 


Don't you love when projects work out like that? 
The best part about this is that it was 100% complete in under an hour. Here's how I did it. 

Step 1
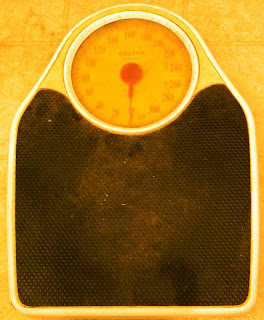
Acquire a crappy scale.
I got this one at Goodwill for about $2. 
Check to make sure it works before you buy it, of course.

Step 2
Clean said crappy scale.
Ta da! Looking better already....

Step 3
Masking tape.
Cover all of the parts you don't want to paint in masking tape and newspaper. You can paint the  'foot' part as well if you want, but I chose to leave mine black. 
Clearly you need to cover the face , unless you want the scale to be purely decorative :)

Step 4
Get this stuff
       
Metallic spray paint, a neon accent color (I used acrylic but this could be spray paint as well), and a clear coat. The clear coat is important if you want the paint to last longer!

Step 5
Paint
Since I planned to paint the green by hand, I went ahead and sprayed all of it. I would recommended doing this outside, but sometimes I don't follow my own recommendations - don't tell my landlord. 
The metallic paint also acts as a base coat for the acrylic. I did two coats of the green and it was fully covered. When you're done with that, spray everything with one or two coats of the clear coat. When that's completely dry...

Step 6
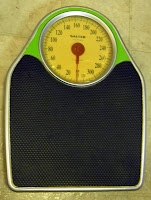
Remove tape. Amaze friends.
          
Stunning transformation, don't you think?

I love it when things turn out my way :)


Thursday, April 5, 2012

36 hours later...

A baby quilt is born! I was comissioned to make this quilt for a customer whose granddaughter had recently passed away. The quilt was intended as a baby shower gift for the new baby as something to remember her sister by - very sad, but sweet...


Scraps of fabric from the girl's clothes were used to make the quilt, as well as a few favorite photos. I ordered the prints from spoonflower.com, and was pleased with the results. For privacy, I don't want to post any of those photos too close up, however. Here's a few favorite blocks:


I think (hope!) she liked it! It's probably the most complicated quilt I've made yet, and I'm proud of my work :)


Here are some in-process pics. The colors are more true in this as well...there wasn't a lot of lighting on the day I handed it off, unfortunately.


Wednesday, January 18, 2012

Quick Tip for Etsy Sellers: Perfect Packaging

I've been selling on Etsy for awhile now, but only recently have I started bringing a steady rate of orders per week. I attribute this to blogging, tweeting, and keeping my shop updated, which are all things I was not as consistent at doing in the past. 


This increase in sales has prompted me to share this tip with you about packaging.
It's a simple thing, but I think that people who shop on etsy are looking for the extra touch they're not going to find if they buy something of the same price-range from a big-box megastore. 

I use recycled materials for shipping wherever possible, but I make sure to wrap the actual item with a scrap bit of tissue paper, fabric, or ribbon to pretty it up a bit :) 

I also hand stamp the address labels, which can be time consuming. To save time, I spent a little while this evening prepping some squares that I can attach to packages as I get them.

I used one of these stamps in the corner of a bit of spare scrapbook paper, 
in this case, but I frequently use the inside of security envelopes as well.


Aren't these beautiful?  I know you're jealous, you can admit it ;-)
I just can't get enough of this style of stamp.


So, here's my quick suggestion: keep all of your shipping supplies handy, make them eco friendly, and prep them as much as possible in advance. It will really help out when you realize you have another order 10 minutes before you're about to walk out the door to the post office....not that I'd know anything about that, of course ;)


Do you have any good packaging advice for etsy sellers? Leave it in the comments!