Pages

Sunday, November 27, 2011

Stitchin' Mission - Completion and Send off

This has taken me a bit to post, but I thought since I was on vacation from work I'd take a vacation from blogging too....Or at least that's my excuse ;-)


Here it is in total, I think I did a pretty decent job at getting the squares to line up accurately. I used a scrappy binding made from the scraps from the center. 


Yay cacti! I machine quilted around the 'stair steps,' and accented the middle black strips by filling it in with more quilting. I don't know if I'm describing that right, but hopefully you'll understand what I mean in the next couple of pictures.

Here's the backside, I got all of that for $2 on sale at Hancock Fabrics! It doesn't have a good hand, but it's shiny and matches the patterns on the front really well I think. While I wasn't able to make a perfect quilt sandwich this time either, there was definite improvement. It's not as wrinkly as it looks in this picture; the shiny fabric just makes it look that way around the stitches. 


Here's a close up of that middle strip from the backside, see what I mean? It looks really cool in person but it was hard to photograph well.

You can see pictures of all of the quilts together at the Stichin' Mission blog here. You can see my 'lovely' self on the right side of the group photo. 


Monday, November 14, 2011

Great Photo Editing Website for Etsy Listings - FotoFuze.com

I recently started using FotoFuze to clean up my listings, and I'm really excited to share the results. If you have a shop on Etsy but don't have optimal lighting/photography equipment, I highly recommend checking this site out. 


Here was my listing originally: 

The photos are pretty good, but the best I could edit the background was to a light blue shade using Picasa. 

Here are the same photos editing using FotoFuze:


As you can see, it makes a huge difference! There is a brief tutorial here  on how to use FotoFuze, but I found it to be pretty user-friendly. 

I should note that you really need to have a smooth black or white background in order for the process to work; I tried using this with some of my older photos taken of items on metal and on a refrigerator and was met with less than stellar results. My background in these photos was simply a piece of printer paper, so you needn't get too fancy.  

You can view my listing here if you want a closer view of some of the thumbnails in the second image.  

The best part about all of this? It's free! Really, you should try it. Really. 


Wednesday, November 9, 2011

Cozy (and green!) Winter Tutorials Round-Up

It snowed for the first time here in Des Moines, and although I'm not too happy about it (I swear I'm meant to be from the tropics!) it did inspire me to share some tutorials with you. 


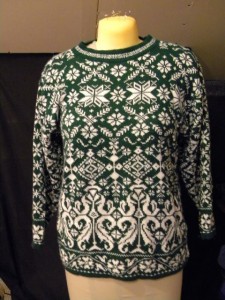
I feel that the ugly sweater population is getting out of hand, but these recycled sweater projects are a good way to humanely eliminate them:


Img source: handmadespark.com


Had enough of ugly sweaters? What projects would you like to see here? Let me know in the comments, and stay warm out there!

Sunday, November 6, 2011

Giveaway At Skip to my Lou!

Hi there!

Just wanted to give you a heads up on the giveaway happening here.


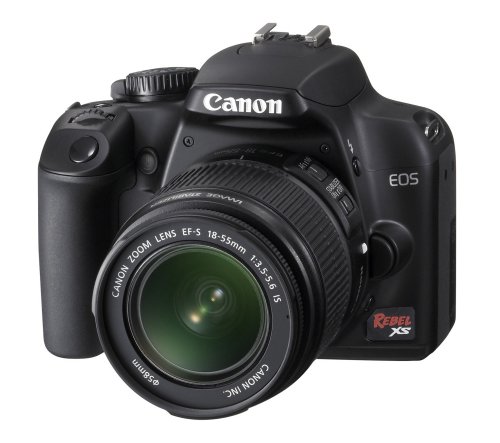
All you have to do is post an item from your bucket list in the comment section. A random winner will get a brand new Canon Rebel SLR camera valued at $650!

(I probably shouldn't tell you about this to increase my odds of winning, but you know I'm all about spreading the love <3)

I don't know about you, but I could definitely put this to good use!

What I'm working on today

Found this cookie-shaped cookie jar at a thrift store and couldn't resist its shape. However, it could use some love.

That's where I come in!

Tutorial to follow when I'm finished, stay tuned!


Saturday, November 5, 2011

Stitchin' Mission - Progress Update


Just wanted to post a few pictures of what I've completed for my mission quilt thus far.

Here's my backing, laid out on my kitchen floor (It was the best place I could find!):
I tried to take pictures of the next part of the process..

But as you can see...

It's really hard to take pictures of yourself from above!

I don't think this is the proper technique, but essentially I basted the middle and had to lay on top of the quilt to reach either end. There's two ways into my kitchen but I wouldn't be able to get around it without climbing on my counter so....improvisation. I hope it doesn't mess it up too badly...

Here's my quilt sandwich, all basted together:
The cactus fabric is weird, yes...I'll just claim to have been going for a 'bold' look :)

I've already started machine quilting, but I don't have pictures of that yet. It's slow going! I think I may simplify the design a little; let's see how I do before the deadline next week.

Do you have any strange techniques to 'get the job done'? Let me know in the comments!


Friday, November 4, 2011

Scrap Project Swap on Craftster

I've joined a swap on Craftster in which participants will use the "Scrappy Patchwork" technique found on Leslie's blog here to make a couple small items. 


I'm not sure what I'll be making yet, but I have some ideas! 


Also, Leslie is building major craft karma for herself by offering to send out an envelope of scraps for free to anyone that wants one! 


I received mine yesterday and am very pleased :)

Thank you so much Leslie! I especially like these pieces:


Can't wait to see what I'll make out of these :D

Tuesday, November 1, 2011

Halloween

Have I mentioned yet that I love Halloween?
I've been away doing the preparations, but now that's its over I can safely come back and post, if not a few pounds heavier. (I'll just say it's a bonus ;-) )
Why heavier? Besides the obvious mounds of candy eaten before the trick or treaters showed up, take a look at these:


Yum! You might have seen these floating around the internet -  cookie/oreo/brownie bars! I go in more detail about that later. For now, candy is calling me....